When the police investigate a crime, they may seek security camera footage from video surveillance…
How to Install Wired Security Cameras: A Step-by-Step Guide for Homeowners
Choosing the right security system to protect your home can be overwhelming, especially with so many options on the market. One of the first big decisions you’ll need to make is whether to go with wired or wireless security cameras. While wireless systems offer flexibility and ease of setup, wired security cameras provide unmatched reliability, security, and high-quality footage.
In this guide, we’ll walk you through why a wired system might be the right fit for your home and how to install your cameras properly.
Wired vs. Wireless Security Cameras: Pros and Cons

Choosing between wired and wireless security cameras depends on your needs for convenience versus reliability. Wireless systems are easy to install and flexible, but depend on Wi-Fi and battery power. Wired systems take more effort to set up but deliver stronger performance, security, and consistency. If long-term reliability is your priority, wired cameras are often the better choice.
Wireless Security Cameras
Pros:
- Easy Installation: No extensive wiring needed—ideal for renters or DIY setups.
- Flexible Placement: Easy to move and reposition as needed.
- Modern Smart Features: Often come with app integration and cloud storage.
Cons:
- Dependent on Wi-Fi: Poor signal can result in lag, dropped footage, or missed alerts.
- Battery-Powered: Requires regular recharging or battery replacement.
- Higher Risk of Hacking: Wi-Fi connections are more vulnerable to cyber threats.
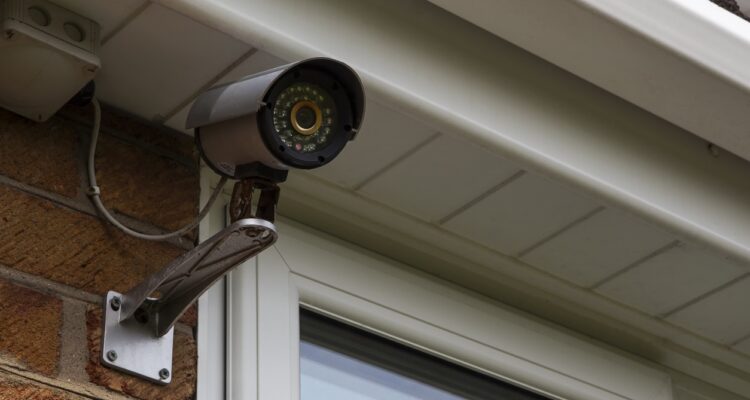
Wired Security Cameras
Pros:
- Stable Connection: Direct cable connection ensures consistent video and audio with no buffering.
- Reliable Performance: No interference from network issues or poor weather.
- Enhanced Security: Hardwired systems are significantly less prone to hacking.
Cons:
- More Complex Installation: Requires routing cables and may need professional installation.
- Less Flexible: Once installed, repositioning cameras is more difficult without rewiring.
- Power Dependency: While not reliant on Wi-Fi, wired cameras still require power—consider using backup power sources.
What You’ll Need Before Installation
Before jumping into the installation process, make sure you have the following:
- A DVR or NVR recording device
- BNC or PoE cables, depending on your system type
- Cameras with mounting hardware
- Power adapters or a PoE switch if needed
- Tools: drill, screwdriver, fish tape, ladder, and cable clips
- Weatherproofing materials if installing outdoors
1. Plan Your Camera Placement
Since moving wired cameras later can be a hassle, pre-planning is critical. Identify key areas to monitor such as:
- Entrances (front, back, and side doors)
- Driveways and garages
- First-floor windows
- Blind spots around your property
Tip: Sketch your home’s layout and mark each camera’s placement, noting nearby power outlets and cable paths.
2. Prepare for Cable Management
Wired cameras require a physical connection from each camera to your DVR or NVR system. Plan cable runs in advance to avoid messy or exposed wiring. Use the following best practices:
- Run cables through walls, attics, or crawlspaces to hide them
- Use fish tape to guide cables through tight spaces
- Label cables to avoid confusion during setup
- Consolidate cables in a central area like a garage or utility room
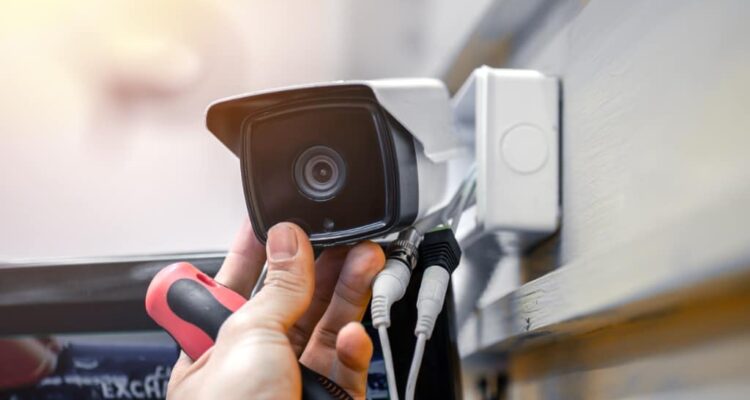
3. Mount Your Cameras
Each camera will come with a mounting template. Follow these steps:
- Mark drill points using the template
- Drill holes for mounting screws and cable access
- Feed the cable through the hole
- Secure the camera mount with screws
- Connect the cable to the camera and adjust its angle
Install cameras at least 9–10 feet off the ground, aiming down toward entry points for the best view and protection from tampering.
4. Connect Cameras to the Recorder
Once your cameras are mounted:
- Plug each camera’s cable into the DVR/NVR input ports
- Connect the DVR/NVR to a monitor using HDMI or VGA
- Ensure all connections are secure and powered on
Your system may include on-screen instructions to guide the final setup steps. From here, you can start configuring settings and angles.
5. Test and Fine-Tune Your System
After connecting everything:
- Confirm each camera is transmitting video to the recorder
- Adjust camera angles as needed
- Set up motion zones, notifications, and storage preferences
- Test your system during different times of day to evaluate image clarity and lighting
3 Reasons to Consider Professional Installation
While DIY is possible, here’s why hiring a security professional might be the smarter move:
- Customized Protection: Experts assess vulnerabilities you may overlook and tailor a system to your home’s layout and security needs.
- Technical Expertise: Avoid installation mistakes and ensure all components work smoothly with one another.
- Future-Proofing: Professionals stay on top of evolving technology, helping you choose systems that are secure, scalable, and compatible with smart home integrations.
Get Expert Help from U.S. Protective Services
Wired security systems offer long-term peace of mind, but installation can be complex. That’s where we come in. U.S. Protective Services has decades of experience designing and installing customized residential security solutions throughout Northeast Ohio.
Our local experts handle everything—from camera placement and cable routing to DVR configuration—ensuring your system is built to last.
Ready to protect your home the smart way? Contact us today for a free consultation or quote.
Related Posts